Hello! Welcome to Couch Surfer Crochet!
I hope you all have enjoyed making all of the squares for the 2019 Block-A-Week Project! There were 25 weeks in total (to make a 5×5 blanket).
Block-A-Week 2019 – Squares
(all of the weeks are posted there)
Make sure you’ve added your “edging” rows to all of your squares before you start! This joining method depends on those little “loops” you make with the edging stitches.
If you need to see that tutorial, you can find it HERE!
Once you’ve “edged” all your squares, make sure to follow the “Joining Tutorial” to join them all together!
I hope you have enjoyed working on this CAL! We are now on the final week : the BORDER!! These squares have been so much fun to create and I truly love the finished blanket. This week I will teach you how to add a border to this blanket. I’ll also show you a trick that I use to make finishing a blanket go much quicker!
I wanted the border to tie all of the squares together nicely, so I chose to go with the Block Stitch (sometimes known as the Box Stitch). One of the squares for this project was the Block Stitch, so I thought it would bring all of it together, while not drawing focus away from all that gorgeous work inside each square! This stitch also works perfectly for all those little “loops” around the border from the edging!
We are still using the I/9 5.5mm hook for the border!
Now…here’s the awesome tip! You can work on this border multiple rows at a time!!! See photo below:
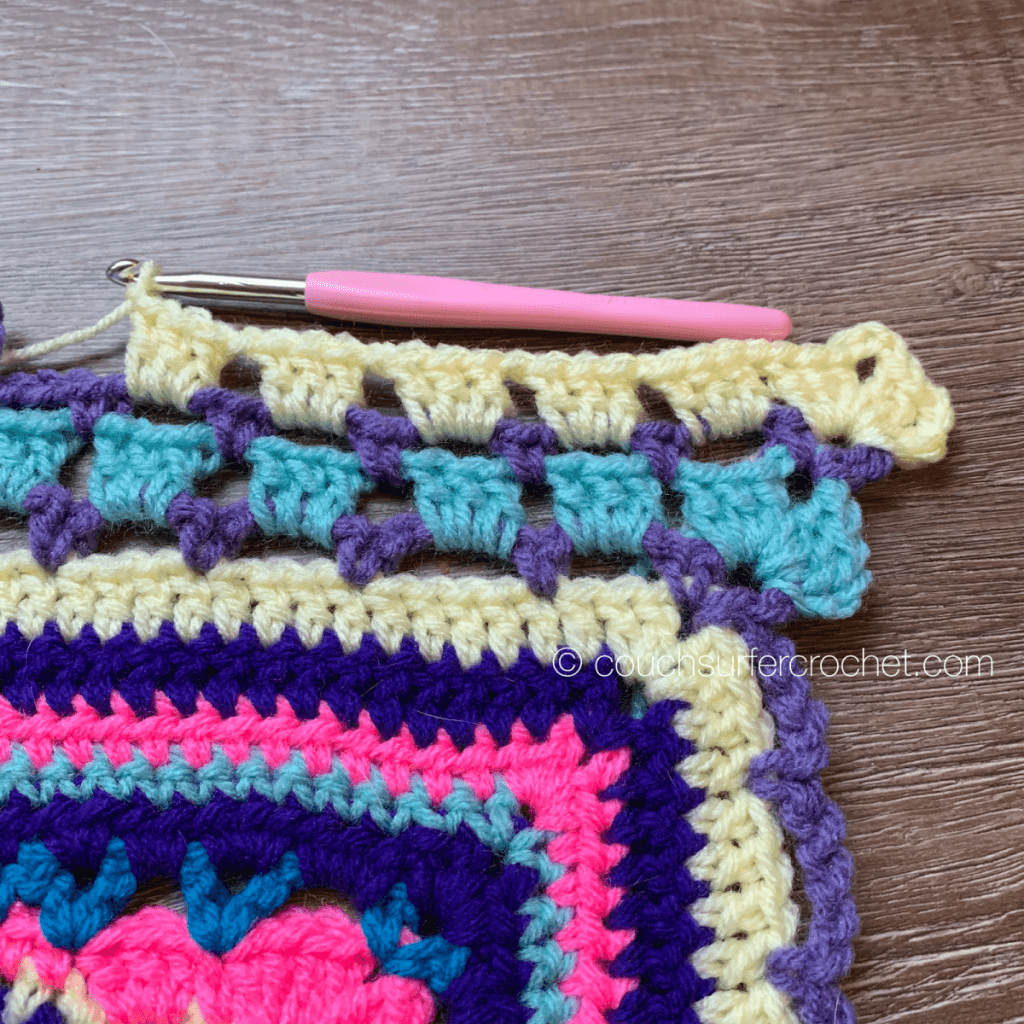
As you know, these kinds of projects can get quite heavy and bulky as they grow! By doing 3 rows at a time you minimize how many times you have to turn this beast to get it done! And it makes you feel like a lightning fast crocheter when you see how quickly you can get it finished.
Adding a border to your blanket:
Round 1: Start in corner : [Ch 3, 2dc, ch 3, 3dc] in corner, *ch 1, sk 1 st, 3dc in loop, repeat from * to corner, **[3dc, ch 3, 3 dc] in corner, repeat from *, sl st to 3rd ch of starting ch3
***in the section of “2 loops” where two squares join, treat each loop individually***
Round 2: Start in corner : ch 1, * [sc, ch 3, sc] in corner, ch 3, sc in ch sp, repeat around, sl to st starting ch 1
Rounds 3-4: Repeat rows 1 & 2
Round 5: Using same color as joining stitches : Start in corner, ch 1, 3 sc in corner, *sc in each st and ch sp across, 3sc in corner, repeat from *, sl st to starting ch 1
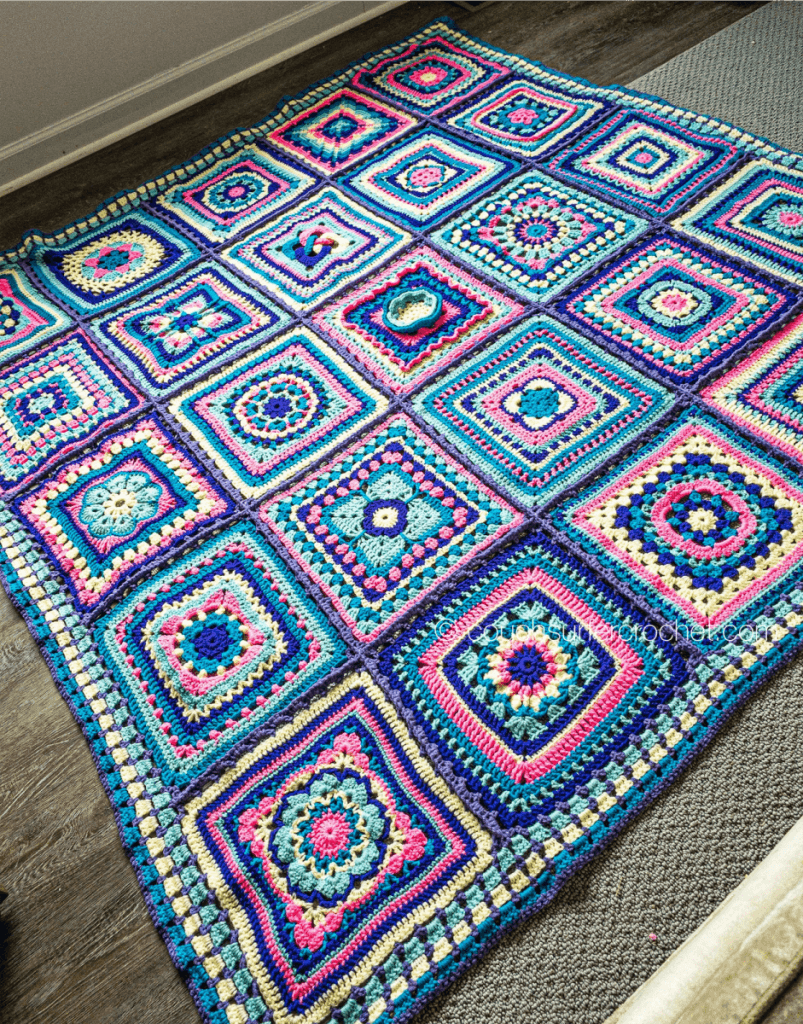
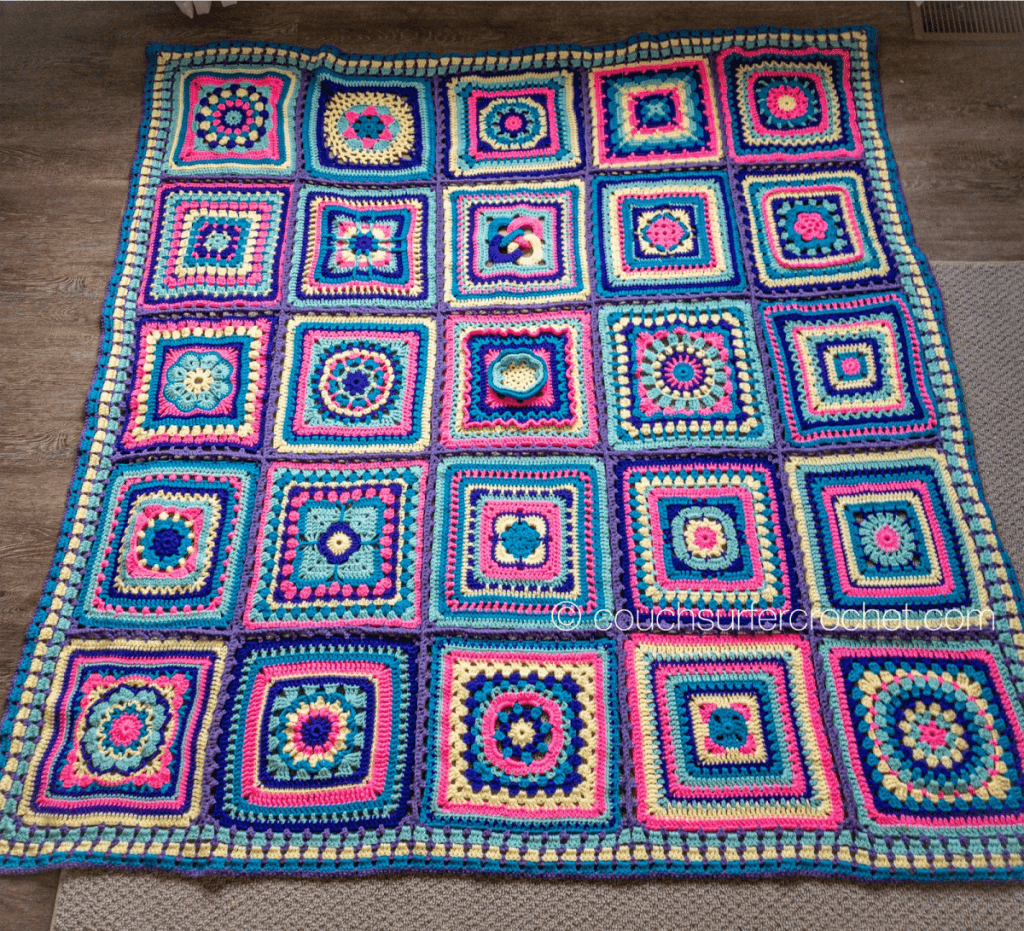
And here is the finished project!! I think it is absolutely stunning. Those colors are so bright and fun. I honestly cannot decide which square is my favorite! Every time I look at these photos a different one stands out. Each one was unique and challenging. I really appreciate the work all of these different designers put into their patterns. Writing patterns can be difficult at times, but each finished piece is so worth it! 🙂
This has been such a joy to create and to share with all of you! I have a Crochet Page and Shop over on Facebook. Like that page to keep up to date with all things Couch Surfer Crochet! Or feel free to join us in the Couch Surfer Crocheters group on Facebook if you haven’t already! I would love to see all of your squares joined up.
If you are on Instagram and want to share there, please tag me @couchsurfercrochet and use the hashtag #blockaweek2019. I’m on Pinterest and Twitter as @couchsurferarts!
Follow my blog with Bloglovin.
Looking for other patterns to try?! Check out my ETSY shop or my Ravelry store! All of the squares I have designed for this project are available to download for free from Ravelry!
Love doing Crochet Alongs? I’ve done quite a few others if you want to check them out!
Mixed Stitch Blanket CAL
Hip to be Square CAL
Changing Chevrons CAL
Stashbuster Granny Square CAL