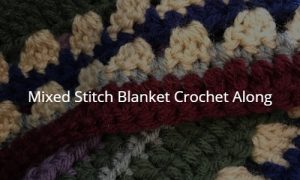
Welcome back to the Mixed Stitch Blanket Crochet Along!
I hope you have enjoyed working on this project! I would love to plan another Crochet Along again soon! This has been so much fun, and I have seen so many awesome versions!
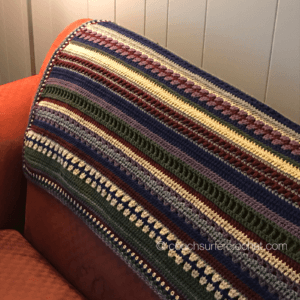
When I finished my blanket I felt that I still wanted to add a little something to it. It looks lovely without a border, but I thought a little bit of an edge would make it a bit sturdier all the way around. Because there are a number of different stitches in this pattern, I didn’t want the border to look to fussy. I wanted to keep it simple.
You can add any border to yours that you prefer, but if you’d like to match mine, I’ve shared how below. I’ve also shared how you can keep going with your project if you want to make it longer before adding a border.
To add a border:
For the border I used the moss stitch (sometimes referred to as the granite stitch). If you need help with the moss stitch, click HERE for a tutorial. I did 7 rows of the border pattern. I used one color twice, on the first and last edge row, and each of the others once.
Starting in corner,
R1: 3 sc, *sc in each st across to end of row, 3 sc in corner, sc as evenly as possible down side, repeat from *
R2-4: Moss stitch
*ch 1, sk 1 st, sc, 3 sc in corner, repeat all the way around
R5-7: Moss stitch
*ch 1, sk 1 st, sc, 5 sc in corner, repeat all the way around
Fasten off and weave in all ends.
Tada! You have a lovely finished blanket to show off!
Want to keep going?
Do you want to keep going with this blanket, but don’t know where to start?!
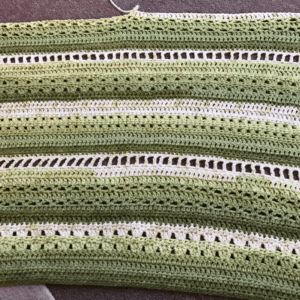
Many people have written to me to ask how they could keep going with this project. I shared with you my second blanket, which I decided to make using Caron Cakes Pistachio yarn. I want to make that one long enough to fit from top to bottom on my queen sized bed. The pattern creates a blanket that is approx 60″x40,” which is perfect for a couch, but not for a bed!
In order to keep the distance between the special stitches consistent throughout the pattern, I figured out that I need to start a number of rows into the pattern. To continue on past Week 8 (Row 80): Return to Week 2 and start with Row 18 (the trc row). This will keep your pattern spacing consistent. Now you can continue on to your desired length. If you’d like to do the border rows at the end of your project, it works best to end on an hdc row, so just keep that in mind as you repeat sections of the pattern!
I hope this has helped you make this project truly one of a kind for you! This has been so much fun to create and share! You are all so awesome, and you have created some beautiful work! If you want to share your finished blanket join us in the Couch Surfer Crocheters Facebook group or tag me on Instagram (@couchsurfercrochet).
If you’ve enjoyed this project, please feel free to share!
Update: Now that this Crochet Along is complete, the FULL pattern is available AD FREE through Ravelry.
Please, please, please feel free to share your work with me! I would love to see your progress and finished pieces. Half the joy of creating is sharing it! You can post your work here in the comments, on my Facebook page, or you can join the Couch Surfer Crocheters FB Group!
If you are on Instagram and want to share there, please tag me @couchsurfercrochet. I’m on Pinterest and Twitter as @couchsurferarts!
Follow my blog with Bloglovin.
Looking for other patterns to try?! Check out my ETSY shop or my Ravelry store!